Cartoon outlining skills — we all need them, daily!
And Procreate is always bringing out new pens, pencils, brushes and other tools… Or are they?
To be honest on any given day, I couldn’t tell you. That’s because
- I’m a creature of habit (so I stick to my favourites to get tried and trusted results) and
- My iPad is set to auto-update, so while I am sure Procreate sometimes ‘does things’ — I don’t even notice — until there is a B-I-G update.
However, during the last Guided Procreate-for-Beginners course I got tinkering with some unfamiliar brushes. Outlining is a challenge for many, so I want to test ways of easing the learning curve of those just dipping their toes into new software.
The first time I used Baskerville (Brushes > Inking > Baskerville), I wasn’t that impressed.
It has a lot of smoothing in its settings, so it feels a bit like working with a line full of ‘stretch’. If you move the tip of your Pencil too fast, it just skips around. But it has a beautiful thick/thin profile, so I felt like it was worth persevering.
And now I think I have at least one new love … because of the crisp, controlled results it creates.
If the idea of Meditative Outlining tickles your fancy maybe you’ll fall in love, too
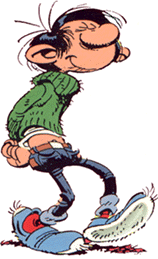
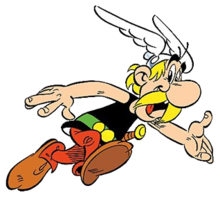
Especially if, like me, you are a sucker for Asterix or Guust/Gaston La Gaffe outlining styles.


Here’s a video of me using Baskerville for outlining
Here are some more insights from my journey with Baskerville…
General hints, tips & pitfalls
You have to take a very leisurely approach to using this brush – if you slow right down and exaggerate the shape that you need (imagine yourself moving a real calligraphy nib, or a tear-drop shaped paintbrush over the page), you can get beautiful control in your thick-thin progressions round curves resulting in amazingly smooth, crisp lines.
Zoom right in on your sketch so that you have a lot of room to move your nib even on relatively small details. For example, I zoom in until the face of my character fills the whole screen (bearing in mind that my iPad is on the 9.7 inch version) — the line edges look pixelated at that magnification, but when you zoom back out they are perfectly smooth.
On the other hand, if you need to make quick zig-zag movements or sketchy, circley movements, this is not the right tool. You just get a series of spindly straight lines or a weird long, tight ‘curl’!
And while in general this brush is better for longer lines and marks, it can work well for a series of short, sharp marks of a similar length — movement marks for example — because the smoothing effect makes each mark very consistent in length and shape.
What to do about curly hair
I’m not sure this is the brush. I would go for one with a rougher, more organic appearance, like the Studio Pen or custom Watercolour brush
The exception would be if you are very patient and want to create a sculpted, precise ringlet-type effect.
Recommendations for getting great results with this brush long term
Stack up a few references (Asterix, Obelix, Lucky Luke and Gaston La Gaffe are all good options) and dedicate a few minutes each day to tracing so that you learn from the masters. Do a section at a time (e.g. the face and hair, the upper body, the lower body, the shoes) so that you build up muscle memory for how the brush works and what looks good when you have multiple marks in a relatively small space.
A particular strength I have discovered
If you are a big fan of thick and thin, but you want to create cartoons with closed shapes (i.e. not too many broken lines) this brush gives you all the control you need to get excellent thick-thin progression without it looking heavy handed where the different liens join one another. And you can easily return to a line and amend it/ extend it seamlessly because the smoothing lets you match the width quite easily.
One odd thing
The pupils of the eyes — you need to tap-and-hold to get a dot for a pupil. Be very deliberate. This brush has a roughly triangular shape, so you’ll never get a round dot… if you want one, you’ll need to swop brushes to a monoline, or something similar.

