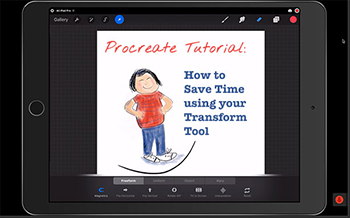
How To Use the Transform Tool To Avoid Re-drawing Things

In this Procreate tutorial we’re going to look at how the Transform tool can save you time and trouble … because it lets you move things around instead of re-drawing them.
Simple step by step Procreate tutorial
The video below walks you step by step through a real-life example that shows your the process for using the Transform tool, which is that small angled arrow at the end of the line of icons in the top left hand corner of the screen.
5 steps in this Transform tool Procreate tutorial:
- Save your Procreate file and ‘share’ it as a JPG file photo
- Open the JPG file as a new Procreate document
- Duplicate the layer
- Select “Transform”, move the layer as required, erase selectively
- Merge Down to get a single layer again
Watch the Procreate tutorial video (and there are detailed written instructions down below in case you need them).
STOP PRESS: This video is pushing its boundaries for some reason! In case it gives you attitude before I figure out what is causing it, here is the link to watch direct on YouTube ?
https://www.youtube.com/watch?v=ehHuP25459Y
Written Procreate tutorial instructions
Save your Procreate file and ‘share’ it as a JPG
This is because initially when you draw your cartoon, you will have at least 4 layers (Background, Sketch, Colour and Outline) but when you use the Transform tool you want to keep things simple and just have everything together in a single layer. Keeping your original Procreate file intact (in case you want to make changes later) but saving a copy at a JPG gives you the best of both worlds: a multi-layer file you can change easily later, and a single layer file to fiddle with via Transform.
Open the JPG file as a new Procreate document
Back in the Gallery view, tap Photo (top right-hand corner, next to the +) and open your newly saved JPG out of the photo app. Voilà, you have a new Procreate file with a single layer.
Duplicate that single layer
Within your Procreate canvas, tap to get into the Layer manager (next to the colour dot, top right-hand corner). Swipe left on Layer 1 and select Duplicate. Rename your layers meaningfully: Original and Copy works like a charm! Tap into the Copy layer. You are now ready to Transform it.
Select the Transform tool
It’s in the arrow icon, last in the row in the top left-hand corner. You’ll notice that there is a dashed line all the way round the outside of your Copy layer. You can now use your finger to push or pull the layer and reposition it as you wish. Once you have it in position, it’s time for some selective erasing in one or both of the layers.
At this point you need to watch the video carefully to see where I’m erasing, and it which layer.
Time to Merge Down
Once you are happy with the repositioning, it’s time to get it all back into a single layer. Make sure you are in the Copy layer, and that is is the one at the top of the pile. In the Layer Manager, tap to pull up the possible actions for that layer, and select Merge Down (second from the bottom). Voilà again — you now have an adjusted image, all back in a single layer to use as you wish
What can go wrong in this so-simple process?
The thing that most often goes wrong is getting confused about which layer you need to erase what from. You need to keep your wits about you and work carefully, watching what you are doing. However, the good thing is that We Are Working Digitally, people! So the Undo function is at our finger tips and all we need to do is double-tap and we get endless opportunities to Do Things Over.
What do I do with Transform?
One of the most useful things to do with Transform is to make things bigger. I use this technique most when I want to inflate the size of selective elements in my toons. For example, it works well to enlarge my character so that it fills the frame more substantially.
It also works well if I want to move some element from a different image into the cartoon I am creating. I can bring in a whole scene and the selectively erase to retain only the elements of it that I want.
You can use Transform at any stage of the cartooning process, but the easiest time is at the Sketch stage (obviously, that’s what sketches are for) or after Outline stage. Once you have multiple layers that all work together it’s more problematic, unless you go this “save as JPG” route to make relatively simple changes.
Next step for you?
Start experimenting! There’s lots to explore ?. Do drop me a line if I’ve raised more questions than I answered!
